Van-Anh Bui (Ven)
This is my work for the assignment of using analogWrite() and delay() to change the brightness of 2 LEDs, one in setup() and the other in loop()
At first I really struggled with this assignment because I did not understand the function of the analogWrite() function as I thought the function will make the value run automatically from 0 to 225 and the brightness of the light will change accordingly.
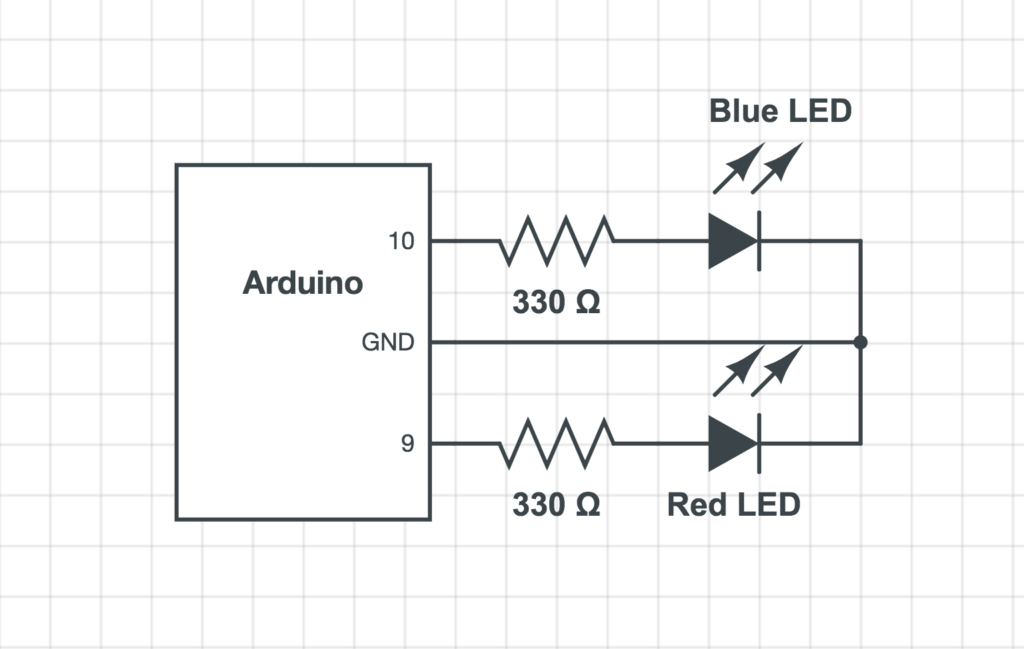
After that, I constructed the circuit consisting of 2 LEDs and tested the program. However, the lights did not behave differently but both followed the setup() function. It turned out that because 2 lights were connected to the same GND, so the setup for one light affected the other.
The difference between the setup and loop is that whatever in setup() only happens once in the beginning, but whatever in loop() will repeat forever.
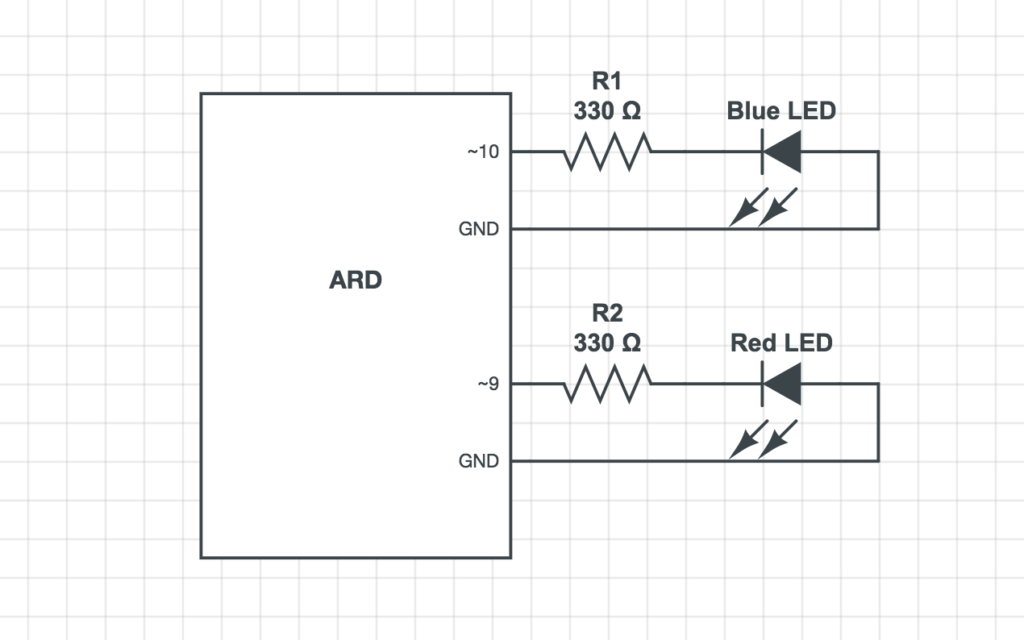
Schematic
Code
//set the variable for PWM pin 9 and 10 as red and blue
int red = 9;
int blue = 10;
// the setup function runs once when you press reset or power the board
void setup() {
// set PWM pin 10 and 9 as output
pinMode(blue, OUTPUT);
pinMode(red, OUTPUT);
//analogWrite value changes from 0 to 220 (minimum to maximum), and the brightness changes correspondingly
analogWrite(red, 0); //off
delay(1000); //wait 1 second
analogWrite(red , 50); //the red LED turns bright
delay(1000); //wait 1 second
analogWrite(red , 100); //higher brightness
delay(1000); //wait 1 second
analogWrite(red, 150); //higher brightness
delay(1000); //wait 1 second
analogWrite(red , 200); //higher brightness
delay(1000); //wait 1 second
analogWrite(red , 225); //the red LED turns brightest
delay(1000); //wait 1 second
}
void loop() {
analogWrite(blue, 0); // off
delay(100); //wait 100 ms
analogWrite(blue, 50); //the blue LED turns bright
delay(100); //wait 100 ms
analogWrite(blue, 100); //higher brightness
delay(100); //wait 100 ms
analogWrite(blue, 150); //higher brightness
delay(100); //wait 100 ms
analogWrite(blue, 200); //higher brightness
delay(100); //wait 100 ms
analogWrite(blue, 225); //the blue LED turns brightest
delay(100); //wait 100ms
//from here the blue LED starts to fade out
analogWrite(blue, 200); //lower brightness
delay(100); //wait 100 ms
analogWrite(blue, 150); //lower brightness
delay(100); //wait 100 ms
analogWrite(blue, 100); //lower brightness
delay(100); //wait 100 ms
analogWrite(blue, 50); //lower brightness
delay(100); //wait 100 ms
analogWrite(blue, 0); //off
delay(100); //wait 100 ms
}
Video
Reading
Regarding the readings, “Art of Interactive Design” and “There Are No Electrons” are my favorite as they define complicated terms and clarify jargons in a very simple and humourous way, which makes it easier to remember. However, I have difficulty understanding some of the code in chapter 4 and 5 of “Getting Started With Arduino”, particularly the use of val and old_val in the experiment of using a button to turn the light on and off.
As pointed out in class, my previous schematic diagram is incorrect, so here is the new and correct schematic diagram of the circuit.